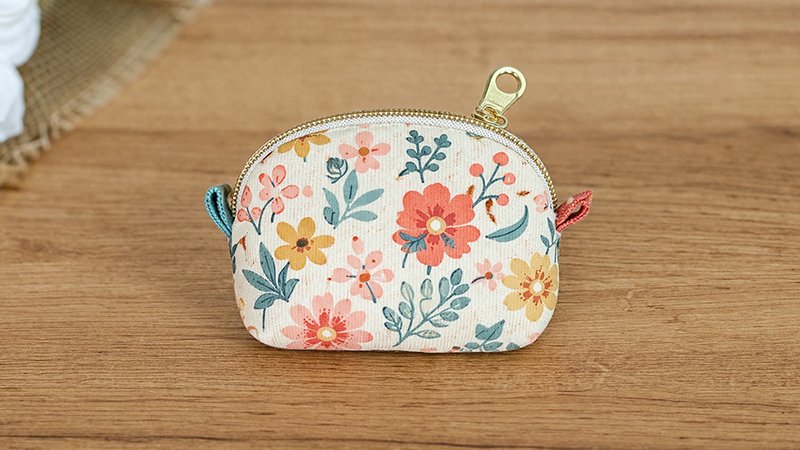
Looking for a quick, satisfying sewing project that uses up your fabric scraps? This tiny zippered coin pouch is perfect. It’s beginner-friendly, highly customizable, and small enough to finish in one sitting—yet polished enough to look professionally made.
This guide walks you through every step in detail, so even if you’re new to sewing zippers or lining bags, you can confidently complete it.
Materials You’ll Need
Fabric
- Exterior fabric: less than 1/8 yard
- Lining fabric: less than 1/8 yard
Interfacing
- Fusible fleece (adds structure and softness)
Zipper (Important!)
- Length: 7 inches
- Width: 1 1/4”
- Recommended:
- YKK size 4.5 zipper
- Size 5 faux metallic zipper (easier to sew over)
Tools
- Fabric marking pen
- Wonder clips or pins
- Sewing machine + zipper foot
- Sewing stiletto (optional but helpful)
- Scissors / rotary cutter
- Iron
Optional
- D-ring or swivel clip (½” opening)
Cutting Instructions
From Exterior Fabric:
- 2 pouch body pieces (template)
- 2 squares: 2” × 2”
- 1 rectangle: 2” × 4” (for tabs)
From Lining Fabric:
- 2 pouch body pieces
- 2 squares: 2” × 2”
From Fusible Fleece:
- 2 pouch body pieces
- 2 squares: 2” × 2”
Zipper Prep:
- Cut the zipper to 7 inches
- Remove metal stops if present
Step 1: Preparation & Marking
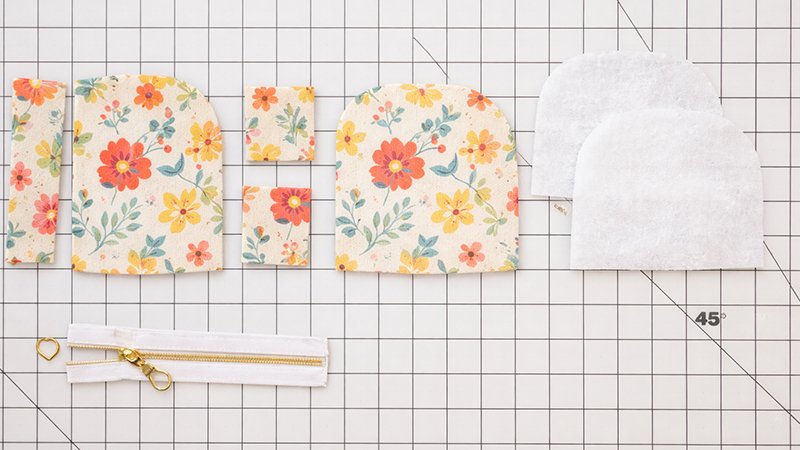
- Fuse interfacing to:
- Wrong side of exterior pieces
- Exterior 2” squares
- Mark the center top of each pouch piece.
- Draw a line:
- ¾” up from the bottom edge
- Do this on all pouch pieces (lining + exterior)
- On lining pieces only:
- Fold the bottom edge up ¼.”
- Press firmly
Step 2: Making Optional Tabs
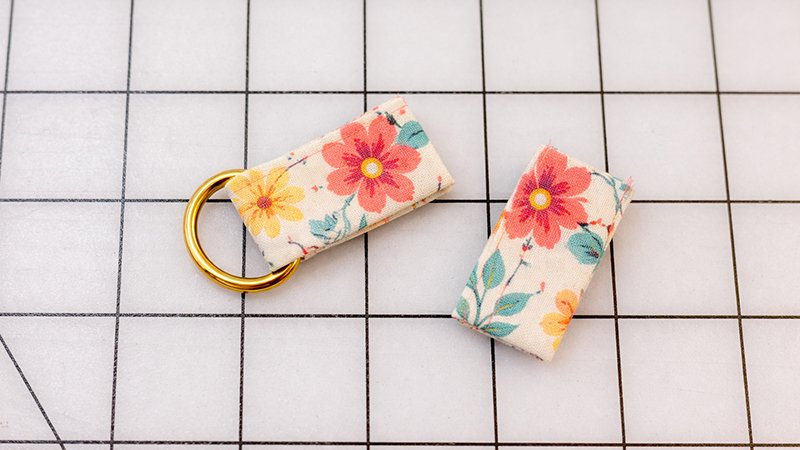
- Take the 2” × 4” rectangle:
- Fold in half lengthwise → press
- Open → fold edges to center → press
- Fold again → press
- You now have a ½” strip
- Topstitch both long edges
- Cut into two 2” pieces
- If using hardware:
- Insert D-ring or clip
- Fold and stitch ends together
Step 3: Creating the Zipper Panel
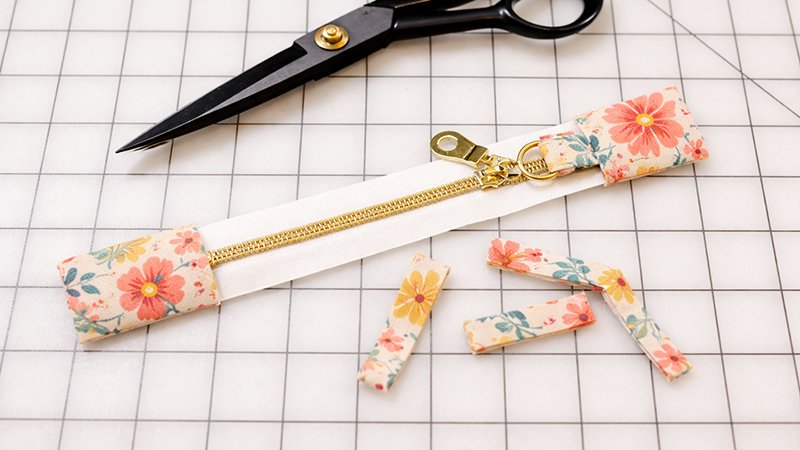
- Add thread stoppers:
- Use a zigzag stitch at both zipper ends
- Attach fabric tabs:
- Place over zipper endsStitch ~1/8” from edge
Attach Fabric Squares
For each zipper end:
Layer like this:
- Bottom: lining square (right side up)
- Middle: zipper (right side up)
- Top: exterior square (right side down)
- Sew across using ¼” seam allowance
- Flip the fabric away from the zipper
- Topstitch 1/8” from seam
- Trim edges flush with the zipper
- Baste around edges to secure
- Mark the center of the zipper
Step 4: Attaching Pouch Sides
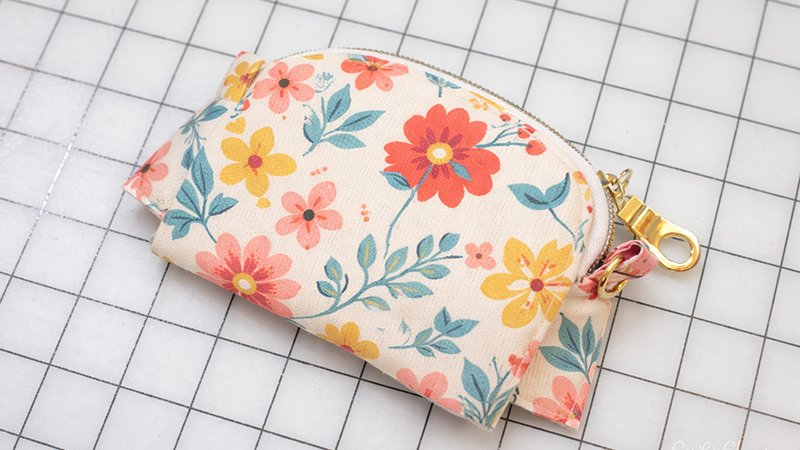
First Side
- Place:
- Exterior piece → right side up
- Zipper panel → right side down on top
- Align:
- Center marks
- Ends with the horizontal lines
- Clip in place
- Sew with zipper foot:
- Use ¼” seam allowance
Add Lining
- Place lining piece:
- Right side down on top
- Stitch directly over the previous seam
Important:
- Start and stop at the marked horizontal line
- Do NOT sew into corners
- Turn the right side out and check
Repeat for Second Side
- Attach the other pouch side the same way
- Use free-arm if needed
Step 5: Sewing Bottom
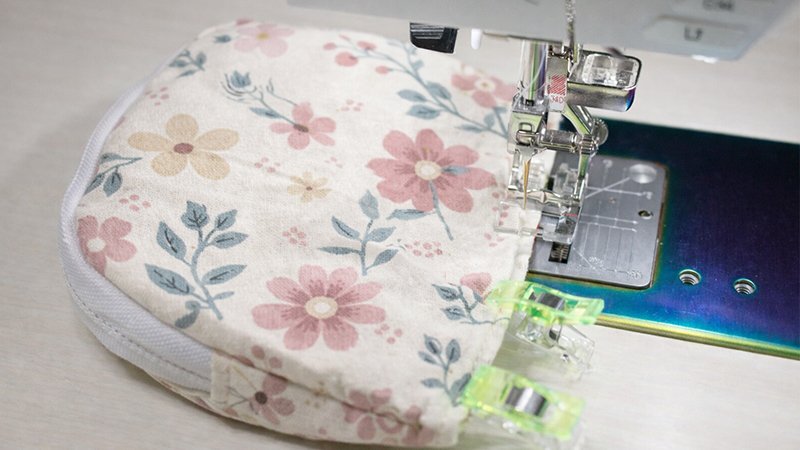
- Turn the pouch inside out
- Separate the lining from the exterior
- Sew exterior bottom edge:
- ¼” seam allowance
- Press seam open
Close the Lining
Before continuing:
Open the zipper halfway!
- Push exterior inside
- Match lining folded edges
- Sew across the lining’s bottom:
- Stitch close to the folded edge
Step 6: Box the Corners
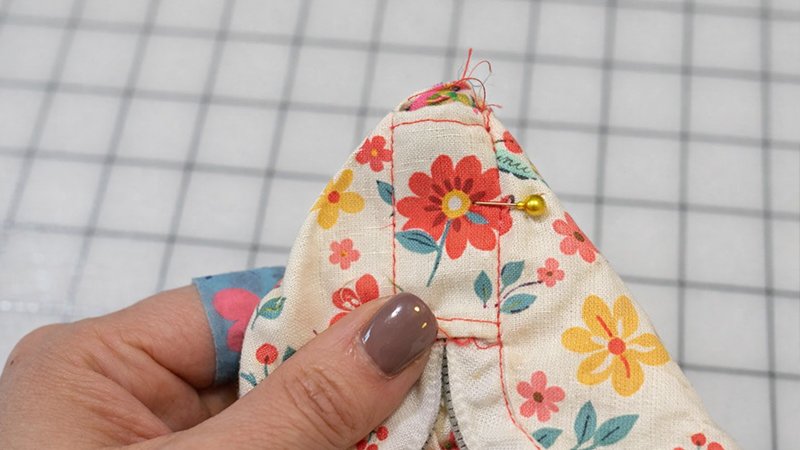
- Keep the pouch inside out
- For each bottom corner:
- Align the bottom seam with the side seam
- Flatten
- Sew across:
- About ¼” above the zipper panel edge
- Trim excess fabric
- Finish edge:
- Wide zigzag stitch
Final Step
- Turn the pouch right side out through the zipper
- Push out corners neatly
You’re done!