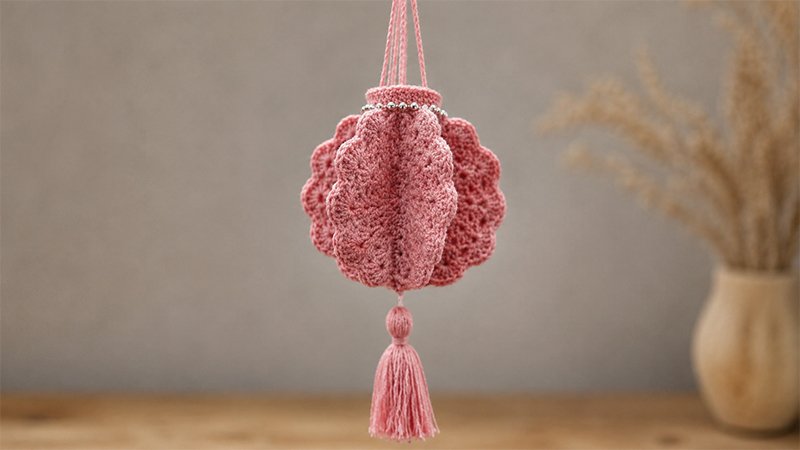
Bring a touch of cozy texture and whimsical charm to your home with this stunning Hanging Crochet Lantern.
This project is beautifully deceptive—while the intricate-looking lace motifs suggest advanced skills, it is actually constructed from simple, beginner-friendly stitches.
By crocheting six identical circular panels and joining them together, you create a structured, hollow tube.
Cinching the bottom and adding a clean, ribbed collar to the top transforms these flat panels into a beautiful 3D accent piece.
It is a fantastic afternoon project for anyone looking to add a handmade, boho-chic element to their living space, patio, or next garden party.
Master Materials List
-
Yarn: Standard Double Knit (DK) weight yarn (Acrylic works great for drape; mercerized cotton adds beautiful stitch definition and extra sturdiness).
-
Hook Size: 4.00 mm (US G/6) crochet hook.
-
Notions: Yarn needle, sharp scissors, and a piece of cardboard (about 4 inches wide) if you plan to make a tassel.
Sizing Tip: Your finished lantern will measure roughly 7.5″ × 7.5″ (excluding the hanging chains and bottom tassel). If you want a stiffer, more structural lantern, consider using a smaller hook (like 3.5 mm) to keep your stitches tight.
Key Abbreviations (US Crochet Terms)
-
ch: Chain
-
st(s): Stitch(es)
-
sl st: Slip stitch
-
sc: Single crochet
-
dc: Double crochet
-
BLO: Back loop only
-
sc2tog: Single crochet two together (decrease)
-
Shell / V-Stitch Clusters: Groupings of double crochets separated by a chain space worked into a single point.
Step-by-Step Construction Guide
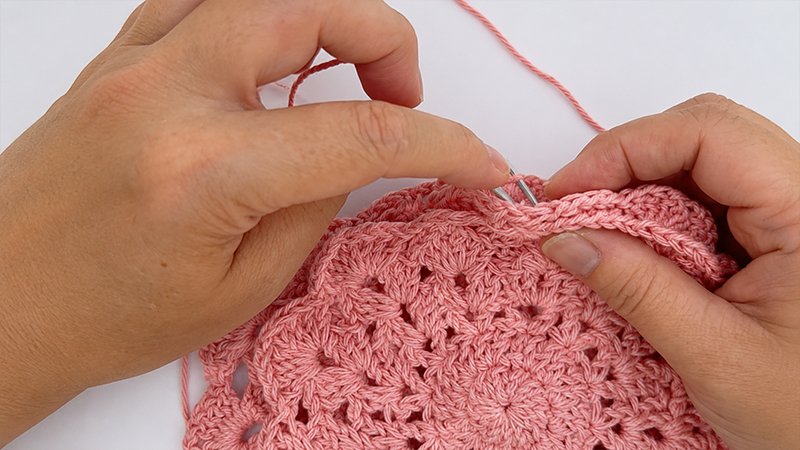
Step 1: Crochet the Six Medallion Panels
You will need to repeat this entire sequence to create 6 identical panels before assembly.
-
Round 1: Start with a loose ch 4. Work 12 dc directly into the fourth chain from your hook (the very first chain made). Join with a sl st to the top of your beginning chain. (12 sts)
-
Round 2: Ch 4 (counts as 1 dc + ch 1). Work 2 dc into every single stitch around the circle. When you reach the final stitch, work just 1 dc into the base of your starting chain to complete the pair. Sl st to join. (24 sts)
-
Round 3: Ch 5 (counts as 1 dc + ch 1), work 1 dc back into that exact same stitch. Skip the next stitch. In the following stitch, create a V-stitch: [1 dc, ch 1, 1 dc]. Repeat this skipping and V-stitch pattern all the way around. Sl st to join. (12 V-stitches total)
-
Round 4: Sl st into the first ch-1 space of the previous round to position your yarn. Ch 3 (counts as dc), then work [1 dc, ch 1, 2 dc] inside that same space. Moving forward, work a double V-stitch [2 dc, ch 1, 2 dc] into every single ch-1 space around. Sl st to join. (12 double V-stitches)
-
Round 5: Sl st into the next ch-1 space. Ch 3 (counts as dc), then work [2 dc, ch 1, 3 dc] into the same space. For the rest of the round, work a triple V-stitch [3 dc, ch 1, 3 dc] into every ch-1 space around. Sl st to join. (12 triple V-stitches)
-
Round 6 (The Shaping Round): Sl st into the next ch-1 space. Ch 3, then work [3 dc, ch 1, 4 dc] into the space. Ch 2, anchor with 1 sc into the ch-1 space from Round 5, ch 2. Work a large cluster [4 dc, ch 1, 4 dc] into the next ch-1 space. Repeat this sequence 4 more times. Finish the round by alternating smaller clusters and ch-2 anchor spaces to complete the border. Sl st to join, fasten off, and weave in your ends.
Step 2: Assembling the Lantern Body
-
Align the Panels: Take two panels and place them back-to-back (wrong sides facing each other).
-
Seam the Edges: Using your yarn needle and a length of matching yarn, sew across 5 of the outer shell edges. Start exactly at a ch-2 space and stop at the corresponding ch-2 space on the opposite side.
-
Leave Openings: Make sure you leave the specific (ch-2, sc, ch-2) sections unsewn—these act as the decorative negative space cuts of your lantern.
-
Form the Tube: Connect a third panel to the second, a fourth to the third, and so on, until all 6 panels are joined in a continuous, open-ended cylindrical tube.
Step 3: Shaping the Base and Collar
Closing the Bottom
-
Round 1: Flatten your tube slightly to find the bottom rim. Join your yarn with a slip stitch to any bottom edge. Work 1 sc into every single (ch-2, sc, ch-2) open space around the entire perimeter. (30 sts)
-
Round 2 & Beyond: Begin decreasing to cinch the base shut. Work sc2tog continuously around the circle. As the opening shrinks down to roughly 5 stitches, fasten off your yarn, leaving a 6-inch tail.
-
Seal: Thread the tail through your needle, weave it through the remaining loops, pull tightly like a drawstring to close the hole completely, and knot securely.
Framing the Top Edge
-
Round 1: Join your yarn at the top open rim of the lantern. Work 1 sc evenly into each (ch-2, sc, ch-2) space around the perimeter. (30 sts)
-
Rounds 2–5: To create a beautiful, structured ribbed collar, work 1 sc into the Back Loops Only (BLO) of every stitch around for the next 4 rounds.
-
Finish: Sl st to the next stitch to even out the round, fasten off, and hide the yarn tail.
Phase 4: Finishing Touches
          [ Hanging Ring ]
           /     |     \
     Ch 50     Ch 50    Ch 50
         /       |       \
      =======================  <- BLO Top Collar
     |                       |
     |      6-Panel Body     |
     |                       |
      =======================  <- Cinched Base
                 |
             [Tassel]
Suspending Chains
-
Attach your yarn to the back post of any single crochet along the top ribbed collar.
-
Ch 50 (or your desired hanging length) to create the first strap. Anchor it with a sl st to the exact opposite side of the collar.
-
Repeat this process two more times, spacing the attachment points evenly at thirds around the collar. Secure all three strands together at the apex with a knot or a small crochet loop for easy hanging.
Creating the Tassel
Wrap your yarn around a 4-inch piece of cardboard roughly 20–30 times depending on how plush you want it. Slip a separate piece of yarn under the top loops and tie it tightly to secure them.
Cut the bottom loops free from the cardboard. Wrap another strand of yarn around the outside of the bundle, about an inch down from the top tie, to create the tassel “neck.”
Tie securely and trim the bottom edges evenly. Tie the top strings of the tassel directly to the cinched center base of your lantern.
Hang your completed lantern near a window, over a reading nook, or pop a lightweight, battery-operated LED tealight inside to watch the lace patterns glow!